Prestashop Integration
This document provides a detailed guide on how to integrate the Prestashop platform with the WMS Weaver system. You will learn, among other things:
- How to generate an API key in Prestashop
- How to configure the connection in WMS Weaver
- How to set up order and inventory synchronization options
Thanks to this integration, your Prestashop orders will automatically appear in WMS Weaver, and inventory levels will be updated in real time, streamlining your online sales operations.
Process of Integrating the Weaver WMS System with Prestashop
1. Creating and Configuring an API Key in Prestashop
-
Log in to the administrative panel of your Prestashop store.
-
In the top navigation bar or side menu, go to Advanced > API.
-
Click the Add new API key button (in some versions of Prestashop, it may say “Create” or “Generate API key”).

-
Generate the API key using the Generate button (the system will automatically create a random token).
-
Fill in the “Key description” field (e.g., “Integration with WMS Weaver”) – this field is optional but helps you identify the key.
-
Set the appropriate Permissions in the API resources table (see below). They should match the requirements of the integration:
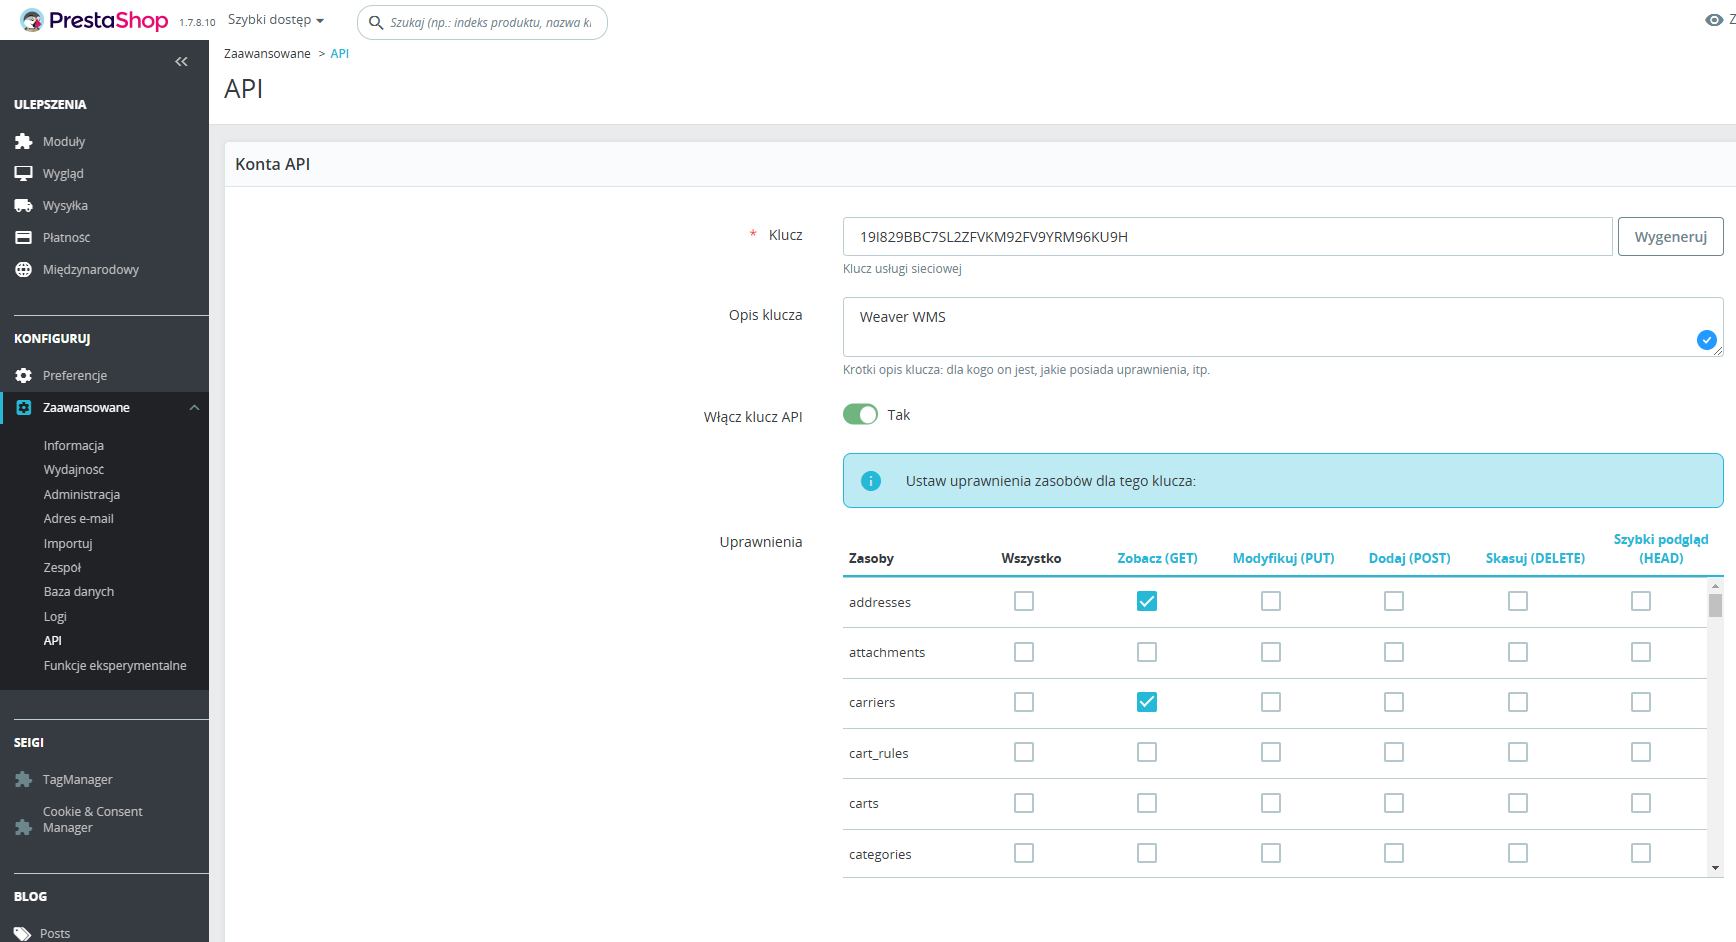
Resource Permissions Orders GET Order_payments GET Order_states GET Order_histories GET, POST Carriers GET Messages GET Addresses GET Countries GET Customers GET Currencies GET Combinations GET, PUT Stock_availables GET, PUT Specific_prices GET, PUT, POST, DELETE Products GET, PUT -
After defining the permissions, click Save or Confirm. Your API key will then be successfully created.

Tip:
Remember to record or securely store your API key. You will need it when configuring WMS Weaver, and sharing it with unauthorized individuals could compromise your data.
2. Configuring Prestashop in WMS Weaver
To connect Prestashop with the Weaver WMS system, follow these steps:
-
Launch WMS Weaver.
-
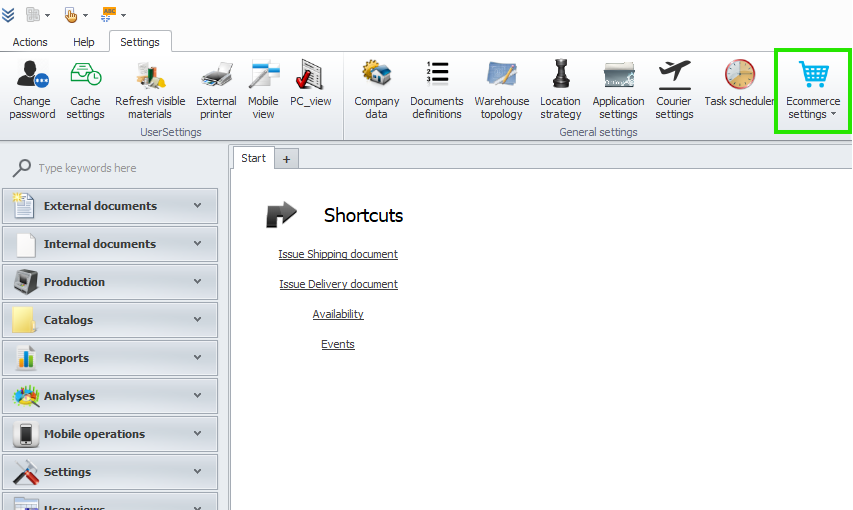
Go to the Settings section (found on the top navigation bar or in the side menu).
-
Select the shopping cart icon labeled E-commerce Settings. In the newly opened window with a list of integrations, click Prestashop.
-
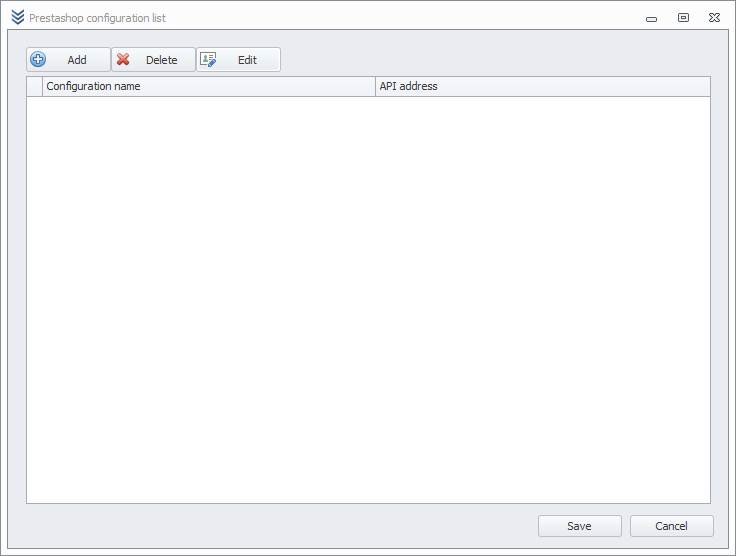
Click the Add button to open the configuration window for the new connection:
-
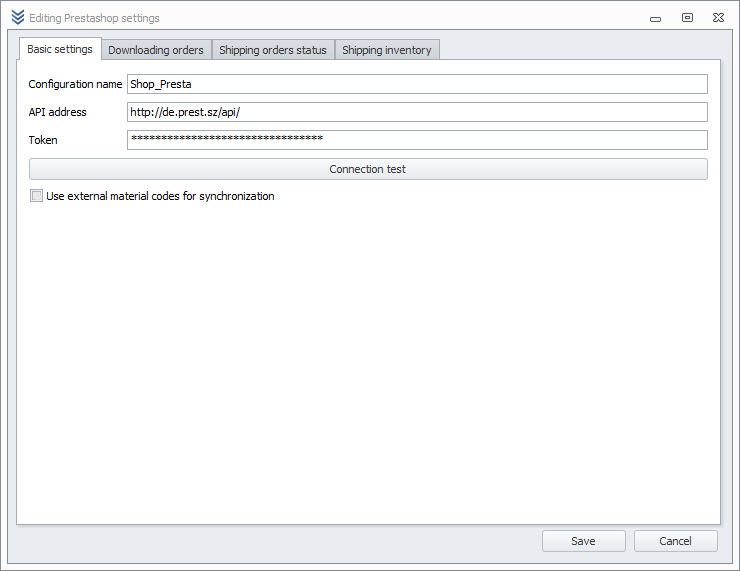
Fill in the configuration details:
- Configuration name: Enter a friendly name, e.g., “Prestashop – Main Store,” to quickly identify the connection if you use multiple stores.
- API address: Enter the API URL of your Prestashop store (e.g.,
http://yourstore.com/api). - Token: Paste the API key generated in Prestashop.
-
Click Test connection to verify the correctness of the entered data.
- If the test is successful, you will see a confirmation message.
- If an error occurs, check if you have correctly entered the API address and token.

-
Save the configuration to activate the integration.
Configuration Options in Weaver WMS
After successfully establishing a connection with Prestashop, you can manage advanced synchronization settings:
1. Retrieving Orders
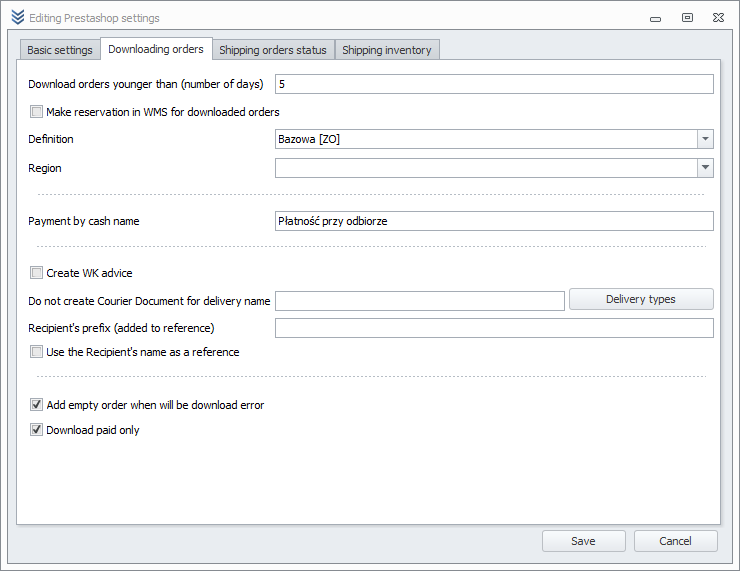
This section is responsible for controlling and automating the import of orders from Prestashop into WMS. Here, you can:
- Specify whether orders should automatically reserve products in the warehouse.
- Determine which orders should be retrieved (e.g., only paid orders).
Tip:
If quick order processing is crucial for your business, consider setting up automatic retrieval every few minutes.
You can also filter orders by their status, e.g., “Paid” or “In progress,” to avoid importing unconfirmed transactions.
2. Sending Order Statuses
This feature allows you to map specific Prestashop statuses to statuses in WMS Weaver (e.g., “In progress,” “Shipped,” “Returned”). This ensures a consistent flow of order status information in both systems.
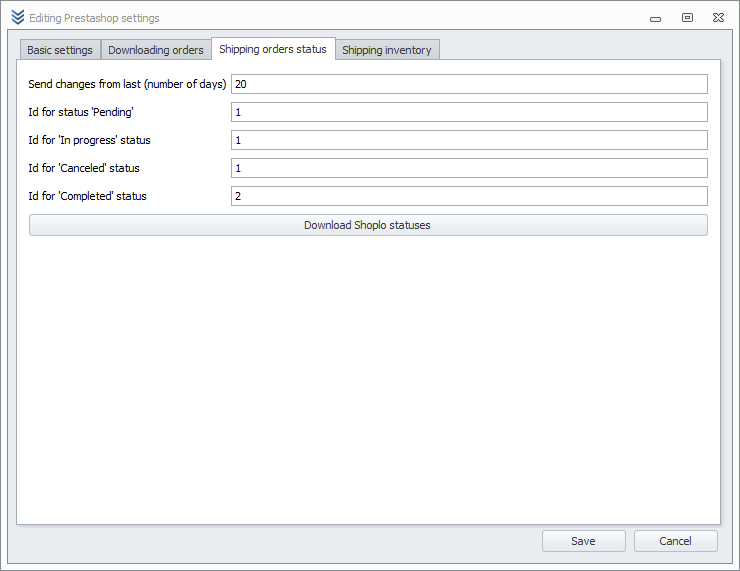
- Provide the corresponding Prestashop status ID to correctly reflect the order's stage in WMS.
- Decide whether updating the status in WMS should automatically change the status in Prestashop.
Hint:
This status mapping is particularly useful for returns and complaints handling, as it avoids confusion caused by manually updating multiple platforms.
3. Sending Inventory Levels
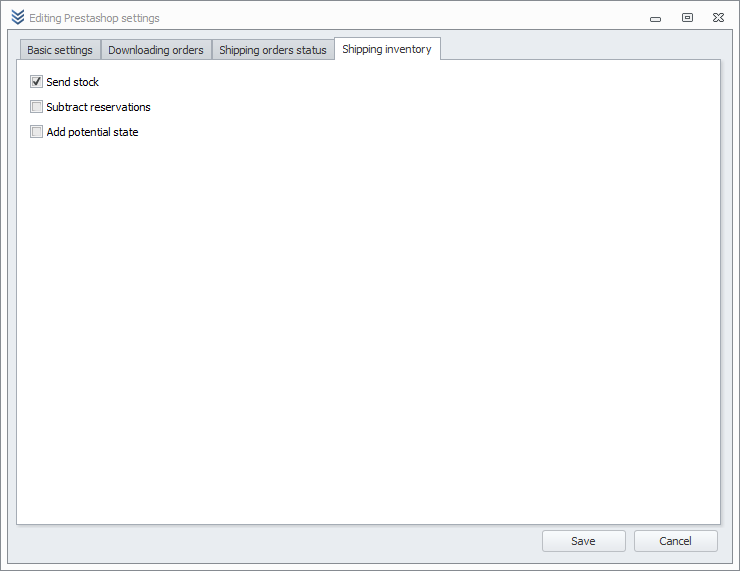
This option determines whether inventory levels in WMS Weaver will be automatically updated in your Prestashop store. It’s essential if:
- You sell products through multiple channels (e.g., several platforms or wholesale).
- You want to prevent overselling and errors resulting from non-updated stock levels.
- You aim to optimize warehouse management as much as possible.
| Variable | Meaning |
|---|---|
| Send stock | Sends inventory levels to Prestashop. Once enabled, the Prestashop store will automatically update its stock levels from WMS. |
| Subtract reservations | Subtracts reserved stock from the total inventory. This way, the Prestashop store will display the actual number of items available. |
| Add potential state | Adds potential stock, which takes into account products that can be manufactured based on the available materials in the WMS warehouse. |
Tip:
If you manage products you manufacture yourself, the “Add potential state” option lets you display a higher product availability in the store, provided you have enough raw materials in stock.
Summary
Integrating Prestashop with WMS Weaver enables:
- Automatic retrieval of orders and assigning them to the warehouse, so you don’t have to manually transfer data between systems.
- Ongoing synchronization of inventory levels, eliminating the risk of overselling or running out of products.
- Unified control over order statuses, without the need to make manual updates in multiple panels.